8 Common PC Monitor Problems You Should Know
In modern work and entertainment, the PC monitor is one of the most vital hardware elements. Whether for work, gaming, or design, the performance and stability of a monitor directly affect the user experience. However, even the best monitors can, in the course of use, acquire some problems – screen flicker, no signal, color distortion, patchy brightness, and more. These common PC monitor problems can be quite frustrating.
As a professional PC monitor manufacturer, Tenfly is here to walk you through the most common PC monitor problems, their potential causes, and the best solutions. We also share with you some easy maintenance tips to prevent problems and make your monitor live longer. Let’s go!
Part 1. Why Are PC Monitor Problems So Common?
PC monitor problems are far from rare. As the device performance improved, the number of interface types multiplied, and the development of display technologies such as HDR, IPS, and 4K continued, the designs of monitors became more complex.
Power supply, signal transmission, graphics card compatibility, refresh rate settings, a slight deviation in any of these parameters can lead to display abnormalities.
Besides, most users are unaware of monitors and thus cannot repair them until they find out what the most common types of monitor problems are and for what reasons they happen.
Part 2. Common Issues with PC Monitors and Their Solutions
There are few outages as frustrating as when your computer monitor blacks out or flickers mid-work or during gaming. To help you get back on track when this happens, we have compiled a few common monitor problems. With your easily accessible solutions, we hope you will resolve these problems quickly and get back on to your work.
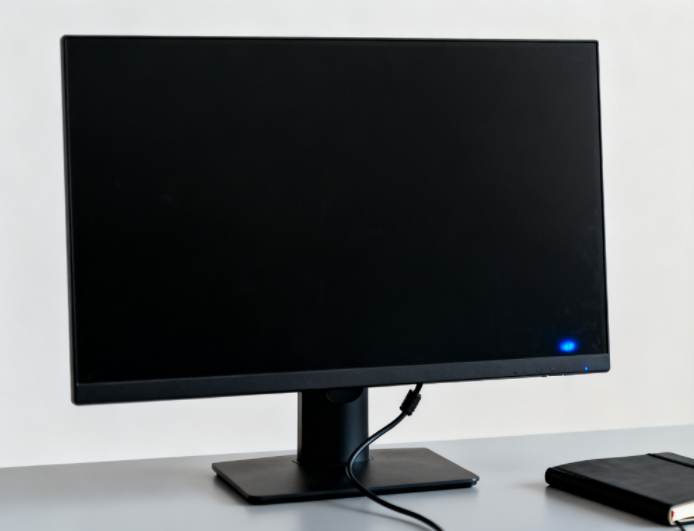
Problem 1. Monitor Not Turning On
When you press the power button but the screen remains completely black, do you also start to turn “dark” along with the monitor? Cheer up—more likely than not, the problem is simpler than you think.
Possible Causes:
- Power cable is not properly connected or there is no power at the outlet
- Power button malfunction
- Internal power module failure
Solutions:
- Check that the power cable is firmly connected to both the back of the monitor and the outlet.
- Try a different outlet or power strip to rule out a power supply issue.
- Press and hold the power button for a few seconds to ensure the button is functioning properly.
- If the monitor still doesn’t turn on, you can try to connect it to another computer to determine whether the issue lies with the monitor or the computer itself.
If none of these methods work, it’s recommended to contact a professional technician for inspection to avoid causing further damage by attempting repairs yourself.
Problem 2. No Signal or Blank Screen
Seeing the message “No Signal” on the screen when the computer is on, or when the screen is blank, it is understandable to assume that the monitor is faulty. Most of the time it is not the case, and these situations involve some difficulties in signal transfer or issues in the input source settings which are not very complicated to fix.
Possible Causes:
- Loose connection between the graphics card and the monitor
- Damaged HDMI, DisplayPort, or VGA cable
- Incorrect input source selected
Solutions:
- Unplug and reconnect the video cable, making sure the ports are clean and free of dust.
- Check that the graphics card port on your computer matches the monitor’s input source.
- If your monitor has multiple input ports, try switching the input source.
- If possible, replace the video cable or test the monitor with another computer.
In most cases, simply checking the cables and input source can quickly resolve the “No Signal” or blank screen issue.
Problem 3. Flickering Screen
A screen that shakes or flickers can be highly frustrating, even causing work or gaming sessions to be interrupted, not to mention the potential eye discomfort or headaches the issues can cause. Although problems such as these can usually be attributed to the graphics drivers, refresh rates, or even signal interference, the problems are mostly easily correctable.
Possible Causes:
- Display refresh rate set too low
- Conflicting or outdated graphics drivers
- Electromagnetic interference or poor-quality cables
Solutions:
- Increase the refresh rate in your computer’s display settings (recommended ≥75Hz) for a smoother, more stable image.
- Update or reinstall your graphics drivers to ensure proper compatibility.
- Keep the monitor away from speakers, power adapters, or other strong electromagnetic sources to reduce interference.
- Use high-quality video cables (e.g., certified HDMI 2.0 / DP 1.4) to ensure stable signal transmission.
With these adjustments, most flickering or shaking screen issues can be significantly reduced, providing a more comfortable viewing experience.
Problem 4. Dead or Stuck Pixels
During the use of a monitor, there may be occurrences of small black or white spots wherein the screen contents are disregarded. These are said to be “stuck screen pixels” or “dead screen pixels”.
A dead pixel is a pixel that is fully “switched off” and is appearing like a black dot. A stuck pixel is a pixel that is fully “switched on” and not changing with the image. These clusters may be distracting even though a few isolated pixels do not severely impact daily use.
Possible Causes:
- Damage to individual pixels inside the LCD panel
- Failure in the pixel control circuitry
Solutions:
- Try using pixel-repair software (such as JScreenFix) for several minutes to a few hours to help stuck pixels recover.
- Gently massage the affected pixel area; sometimes this can reactivate the pixel, but be careful not to damage the panel.
- If many dead or stuck pixels appear, it’s time to contact the manufacturer for repair or consider replacing the panel to maintain optimal display quality.
In most cases, a few dead or stuck pixels are not critical, but addressing them early can prevent the issue from worsening.
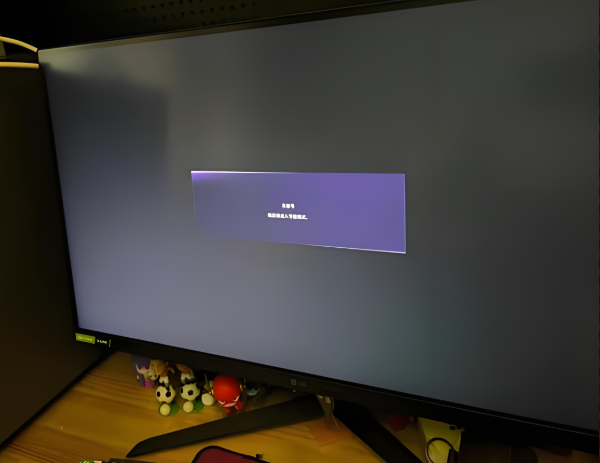
Problem 5. Color Distortion or Dim Display
Sometimes you may notice that your screen appears too yellow, too blue, or generally dim, which can cause eye fatigue over time. This not only affects everyday viewing but can also be a problem for tasks that require accurate color, such as design or video editing.

Possible Causes:
- Incorrect color temperature settings, leading to color casts
- Aging monitor with dying backlight
- Bad contact in signal cables, leading to unstable transmission
- Abnormal graphics card or driver output
Solutions:
- Reset the monitor to its default color settings or use a professional calibration tool to ensure accurate colors.
- Check the RGB output settings in your graphics card control panel to rule out configuration issues.
- Connect the monitor to another computer to determine whether the problem is caused by the graphics card or main system.
- If the monitor is clearly aging and brightness has significantly decreased, consider replacing it with a new model for more stable color performance and a better viewing experience.
With these steps, most color distortion or dim display issues can be improved, providing a clearer, more comfortable screen.
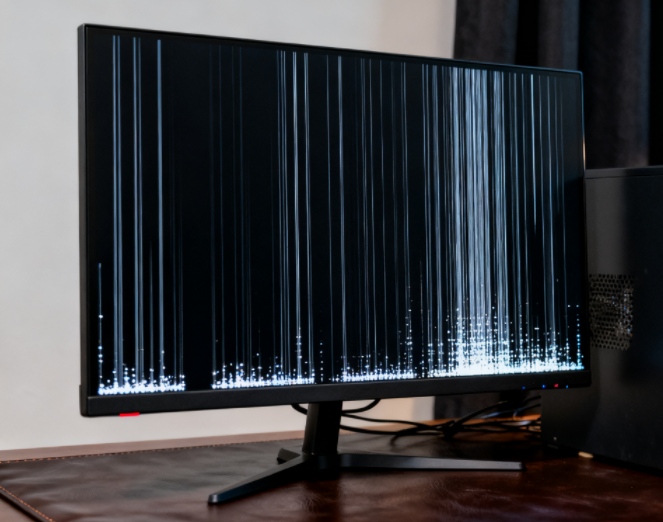
Problem 6. Lines or Color Artifacts
Sometimes, you may notice horizontal or vertical lines on your screen, or strange colored dots and noise. This can be a severe invasion of your viewing experience when you are gaming, video editing, or designing.
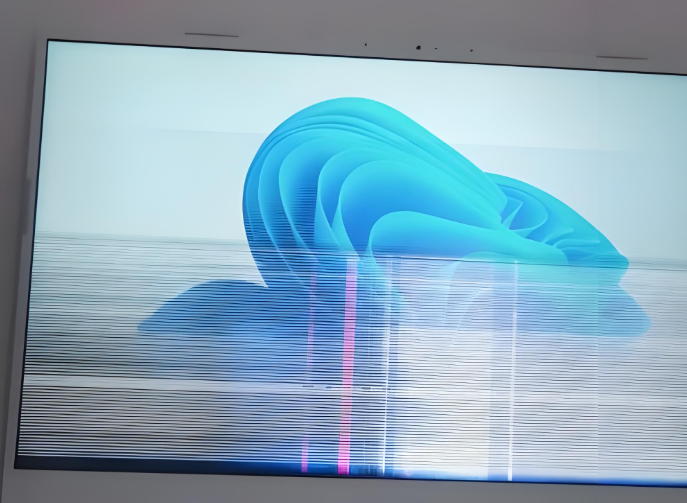
Possible Causes:
- Graphics card driver issues or hardware failure
- Poor quality or loose video cables
- Failure in the monitor panel hardware
Solutions:
- Check video cables: Unplug and reconnect HDMI, DisplayPort, or VGA cables, making sure the ports are clean and dust-free, and that the cable itself is not damaged.
- Replace the cable: Try using a high-quality replacement cable to rule out signal interference caused by the original cable.
- Update or reinstall graphics drivers: Ensure that your drivers are compatible with your operating system and resolve any potential conflicts.
- Test with other devices: Connect the monitor to another computer, or connect your computer to a different monitor, to determine whether the issue lies with the graphics card or the monitor panel.
- Contact professional support: If the problem persists after these steps, the monitor panel may have a hardware fault and may require professional repair or replacement.
By following these troubleshooting steps, most issues with lines or color artifacts can be diagnosed and resolved, restoring your screen to normal display quality.
Part 3. Systematic Troubleshooting to Diagnose Monitor Problems
Above, we discussed common monitor issues and their solutions. However, sometimes resolving one issue may not indicate the root cause, or multiple symptoms appear simultaneously, so it is difficult to diagnose.
In such cases, the systematic troubleshooting procedure is especially important. It allows you to see the larger picture and follow a systematic step-by-step approach to determine the issue to avoid unnecessary replacement of equipment or fruitless repeat attempts.
To make things easier, we have also organized a clear step-by-step troubleshooting guide.
Step 1. Ensure Proper Power Supply
Check that the power cable is securely connected to both the monitor and the wall outlet, and confirm that the outlet is working.
Observe whether the monitor’s indicator light turns on. If it doesn’t, the issue may lie with the power source or power button.
If the power button feels stuck or unresponsive, try pressing and holding it for a few seconds to rule out contact problems.
Step 2. Check Signal Input
Make sure the video cable (HDMI, DisplayPort, VGA, etc.) is firmly connected, and the ports are clean and free of dust.
Verify that the monitor’s input source matches the graphics card port.
If the monitor has multiple input ports, try switching between them to determine whether the “No Signal” or blank screen is caused by incorrect input selection.
Step 3. Test Graphics Card Output
Connect the monitor to another computer, or connect your computer to a different monitor, to identify whether the issue is with the monitor or the graphics card/PC.
If the graphics card has multiple output ports, try using a different port to rule out port damage or hardware issues.
Step 4. Update System and Drivers
Graphics drivers, display settings, and operating system versions can all affect output.
Make sure the graphics driver is up-to-date; if necessary, uninstall and reinstall it.
Check that the resolution and refresh rate are compatible with the monitor to avoid flickering or abnormal display.
Step 5. Restore Factory Settings
Internal monitor settings or software glitches can sometimes cause display issues.
Use the monitor’s menu to reset it to factory defaults to rule out configuration problems.
Keep in mind that restoring factory settings will erase any customized brightness, color modes, or other user preferences.
From this “outside-to-inside” step-by-step troubleshooting method, you can start with the simplest external checks and gradually move inward to settings and hardware inspection. This approach helps you quickly identify the root cause, improves efficiency in solving problems, and prevents unnecessary device replacement or financial loss.
Part 5. When to Consider Replacing Your Monitor?
If you’ve tried various ways to fix your monitor but still haven’t achieved satisfactory results, or if certain issues are too costly to repair, or may even affect long-term usage, it might be time to consider choosing a new PC monitor. The following situations are worth noting, as opting for a new monitor is often more practical, saving both time and effort.
1. Severely aged or non-functional Backlight
If the screen brightness has decreased, contrast is unusable, or the backlight doesn’t work at all, replacement of the backlight or repair of the monitor can be costly and of limited results.
2. Damage to mainboard or internal hardware with repair costs approaching a new monitor
While resolving issues related to a monitor’s mainboard, control circuits, or power module can be costly, it’s usually better to replace the monitor if the repair costs become similar to the cost of a new monitor.

3. Dead pixels, burn-in, or some color issues
These can be repaired if they cover a small section of the monitor, and in some scenario the overall display may not be able to attain its original quality.
4. Long-term overheating or frequent flickering causing visual discomfort
Overheating issues may be due to the monitor’s age and its ability to dissipate heat or the monitor’s low refresh rate which may result in flickering and visual discomfort, headaches, or reduced productivity during prolonged use.
A new monitor can provide better resolution, response rate, color accompaniment and overall improved display ease. A new monitor can increase productivity and overall visual comfort significantly for those that use computers for long periods of time, whether for work, design, gaming or entertainment. The best way to increase productivity and visual comfort is a new monitor.
Part 6. How to Prevent Future Monitor Problems?
Want your monitor to last longer and function more effectively? Good user habits and diligent everyday care are necessary; they not only reduce aging, but greatly minimize the risks of developing problems. Similarly, we have gathered a few practical tips to assist you in keeping your monitor functioning optimally.
- Surge-Protected Outlet
Monitors have malfunctioning internal power boards due to unregulated power surges and voltage fluctuations. Unexpected damage is avoided when power strips and outlets are surge protected.
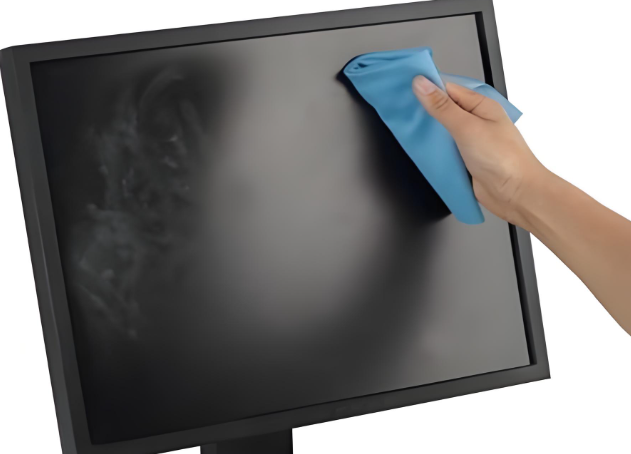
- Regularly Clean Vents and the Screen
Dust buildup can block airflow, cause overheating, and even affect color performance.
Periodically use a soft, clean cloth or air blower to clean the monitor’s vents and gently wipe the screen to keep it dust-free.
- Avoid Running at Maximum Brightness for Long Periods
Prolonged use at full brightness accelerates backlight aging, leading to dimming or uneven brightness.
Adjust brightness according to ambient light, keep it at a moderate level, and consider enabling eye-care or auto-brightness modes.
- Minimize Frequent Plugging and Unplugging of Video Cables
Repeatedly connecting and disconnecting HDMI, DisplayPort, or VGA cables can loosen or damage the ports, causing no-signal or flickering issues.
Keep connections stable and, if necessary, use extension cables or switchers to reduce wear on the ports.
- Regularly Check for Driver Updates and Display Settings
Graphics drivers, OS updates, or display settings can all impact monitor performance.
Periodically update drivers and confirm that resolution, refresh rate, and color settings match your monitor’s specifications to maintain stable display quality.
Wrap Up
If your monitor encounters common issues such as failing to power on, flickering, color distortion, or no signal, there’s no need to rush into replacement. By following the troubleshooting and preventive tips provided in this guide, most problems can be easily resolved, helping your monitor return to normal operation.
However, if the monitor is beyond repair, Tenfly, as a professional PC monitor manufacturer, provides good quality and dependable monitors for replacements, making sure your upgrade provides a clearer and more stable visual experience as well.